diy distressed shorts
 I instagrammed a photo of these two weeks ago, and I've been restraining myself from taking scissors to my entire jean collection. I distressed these in a few spots and I love the outcome. These were a pair of vintage levi's boyfriend jeans that I picked up at a thrift shop that needed to be re-loved.
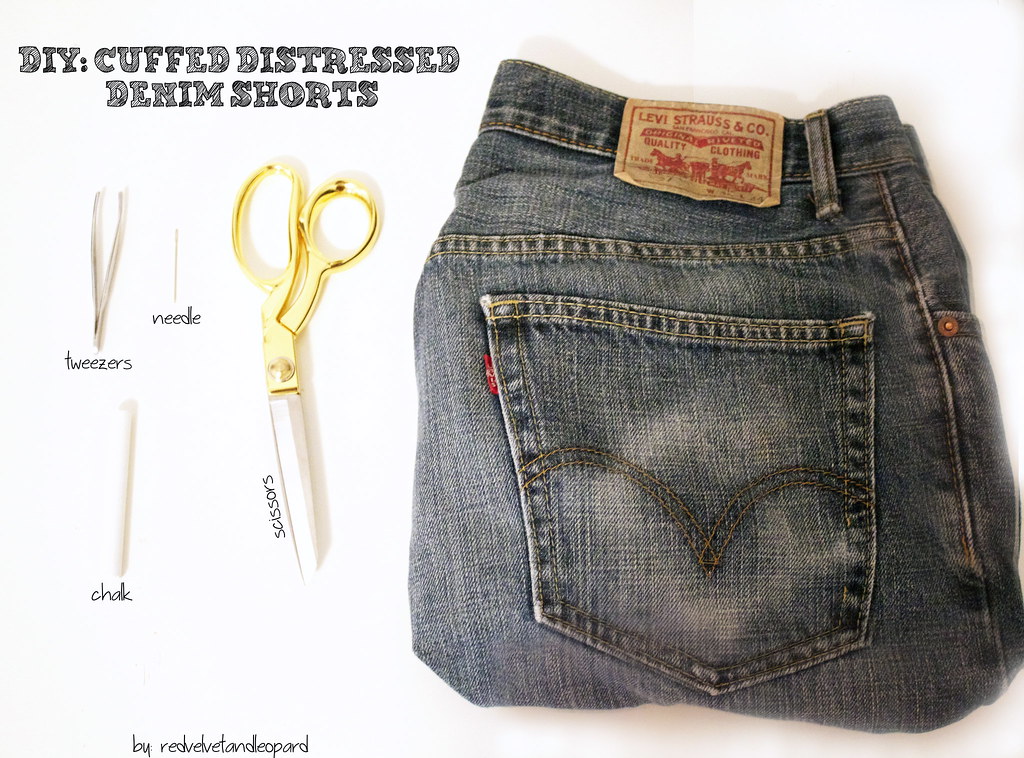
 *Jeans
*Measuring Tape
*Chalk or Fabric Marker
*Sharp scissors
*Jeans
*Measuring Tape
*Chalk or Fabric Marker
*Sharp scissors

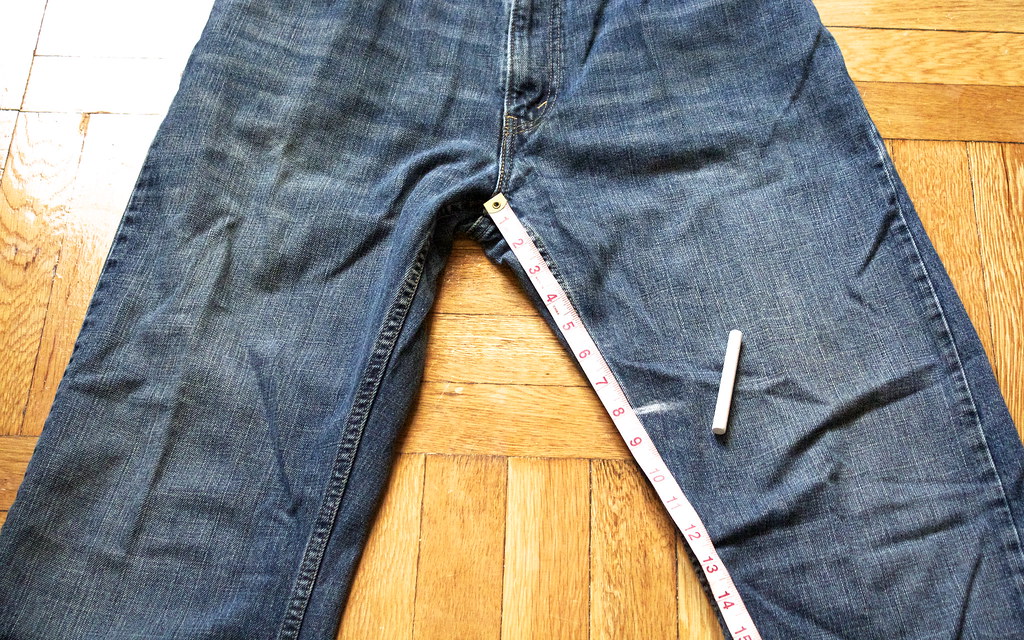
 Slip on jeans and measure where you want to cut jeans with chalk (or fabric marker). If you plan to cuff them, add about two inches to your desired length. Cut jeans at marked lines with scissors.
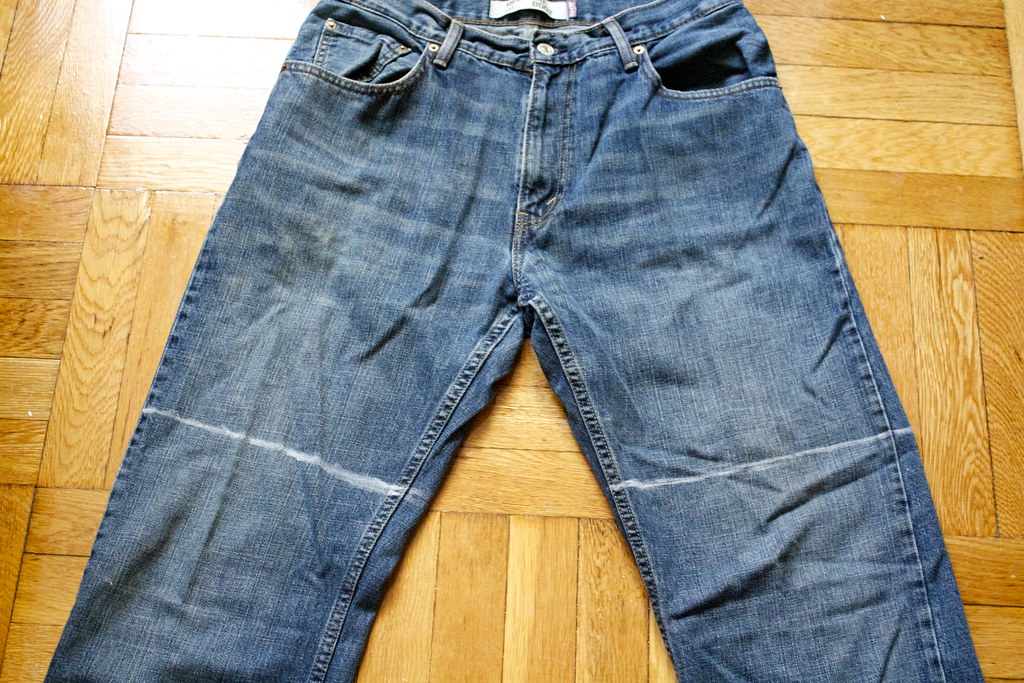
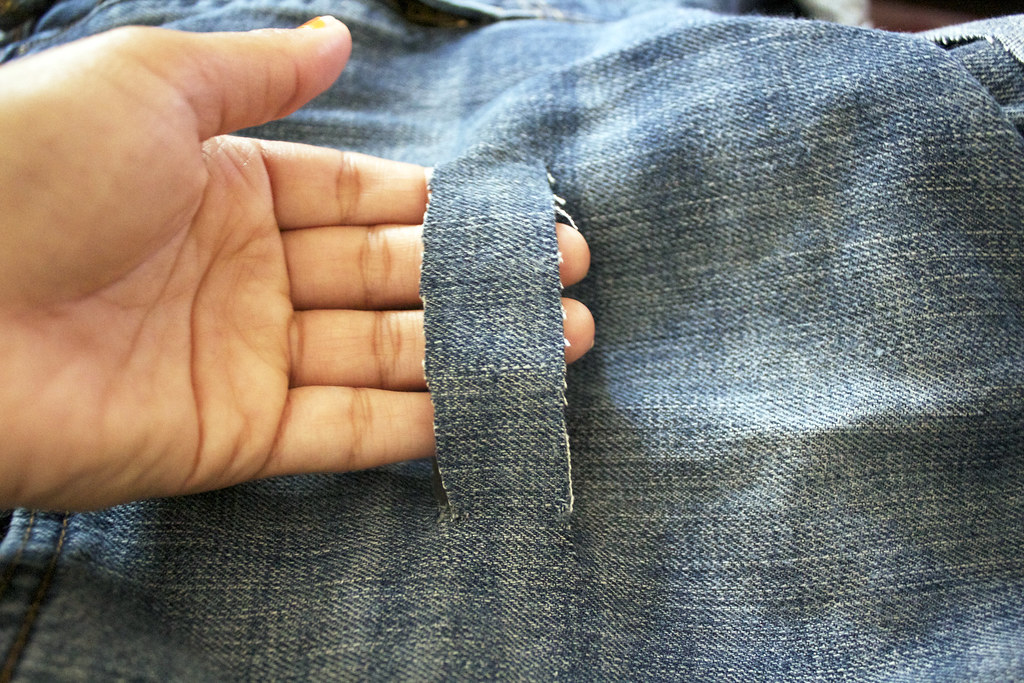
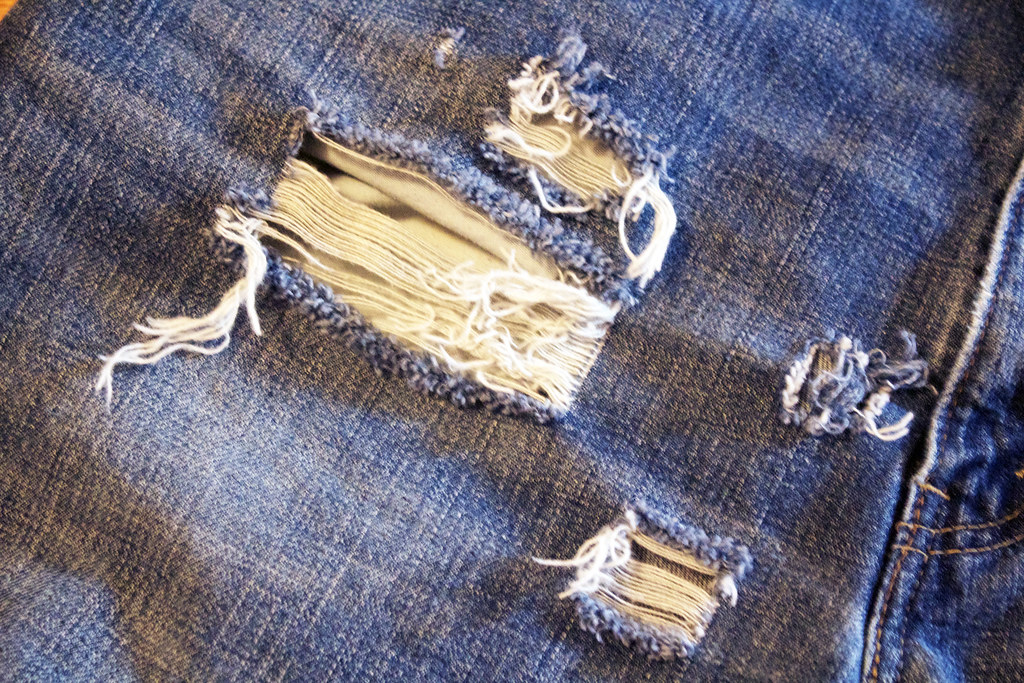
 With scissors, cut two slits in area where you want to distress. Keep in mind the distressing will occur inside of the two slits.

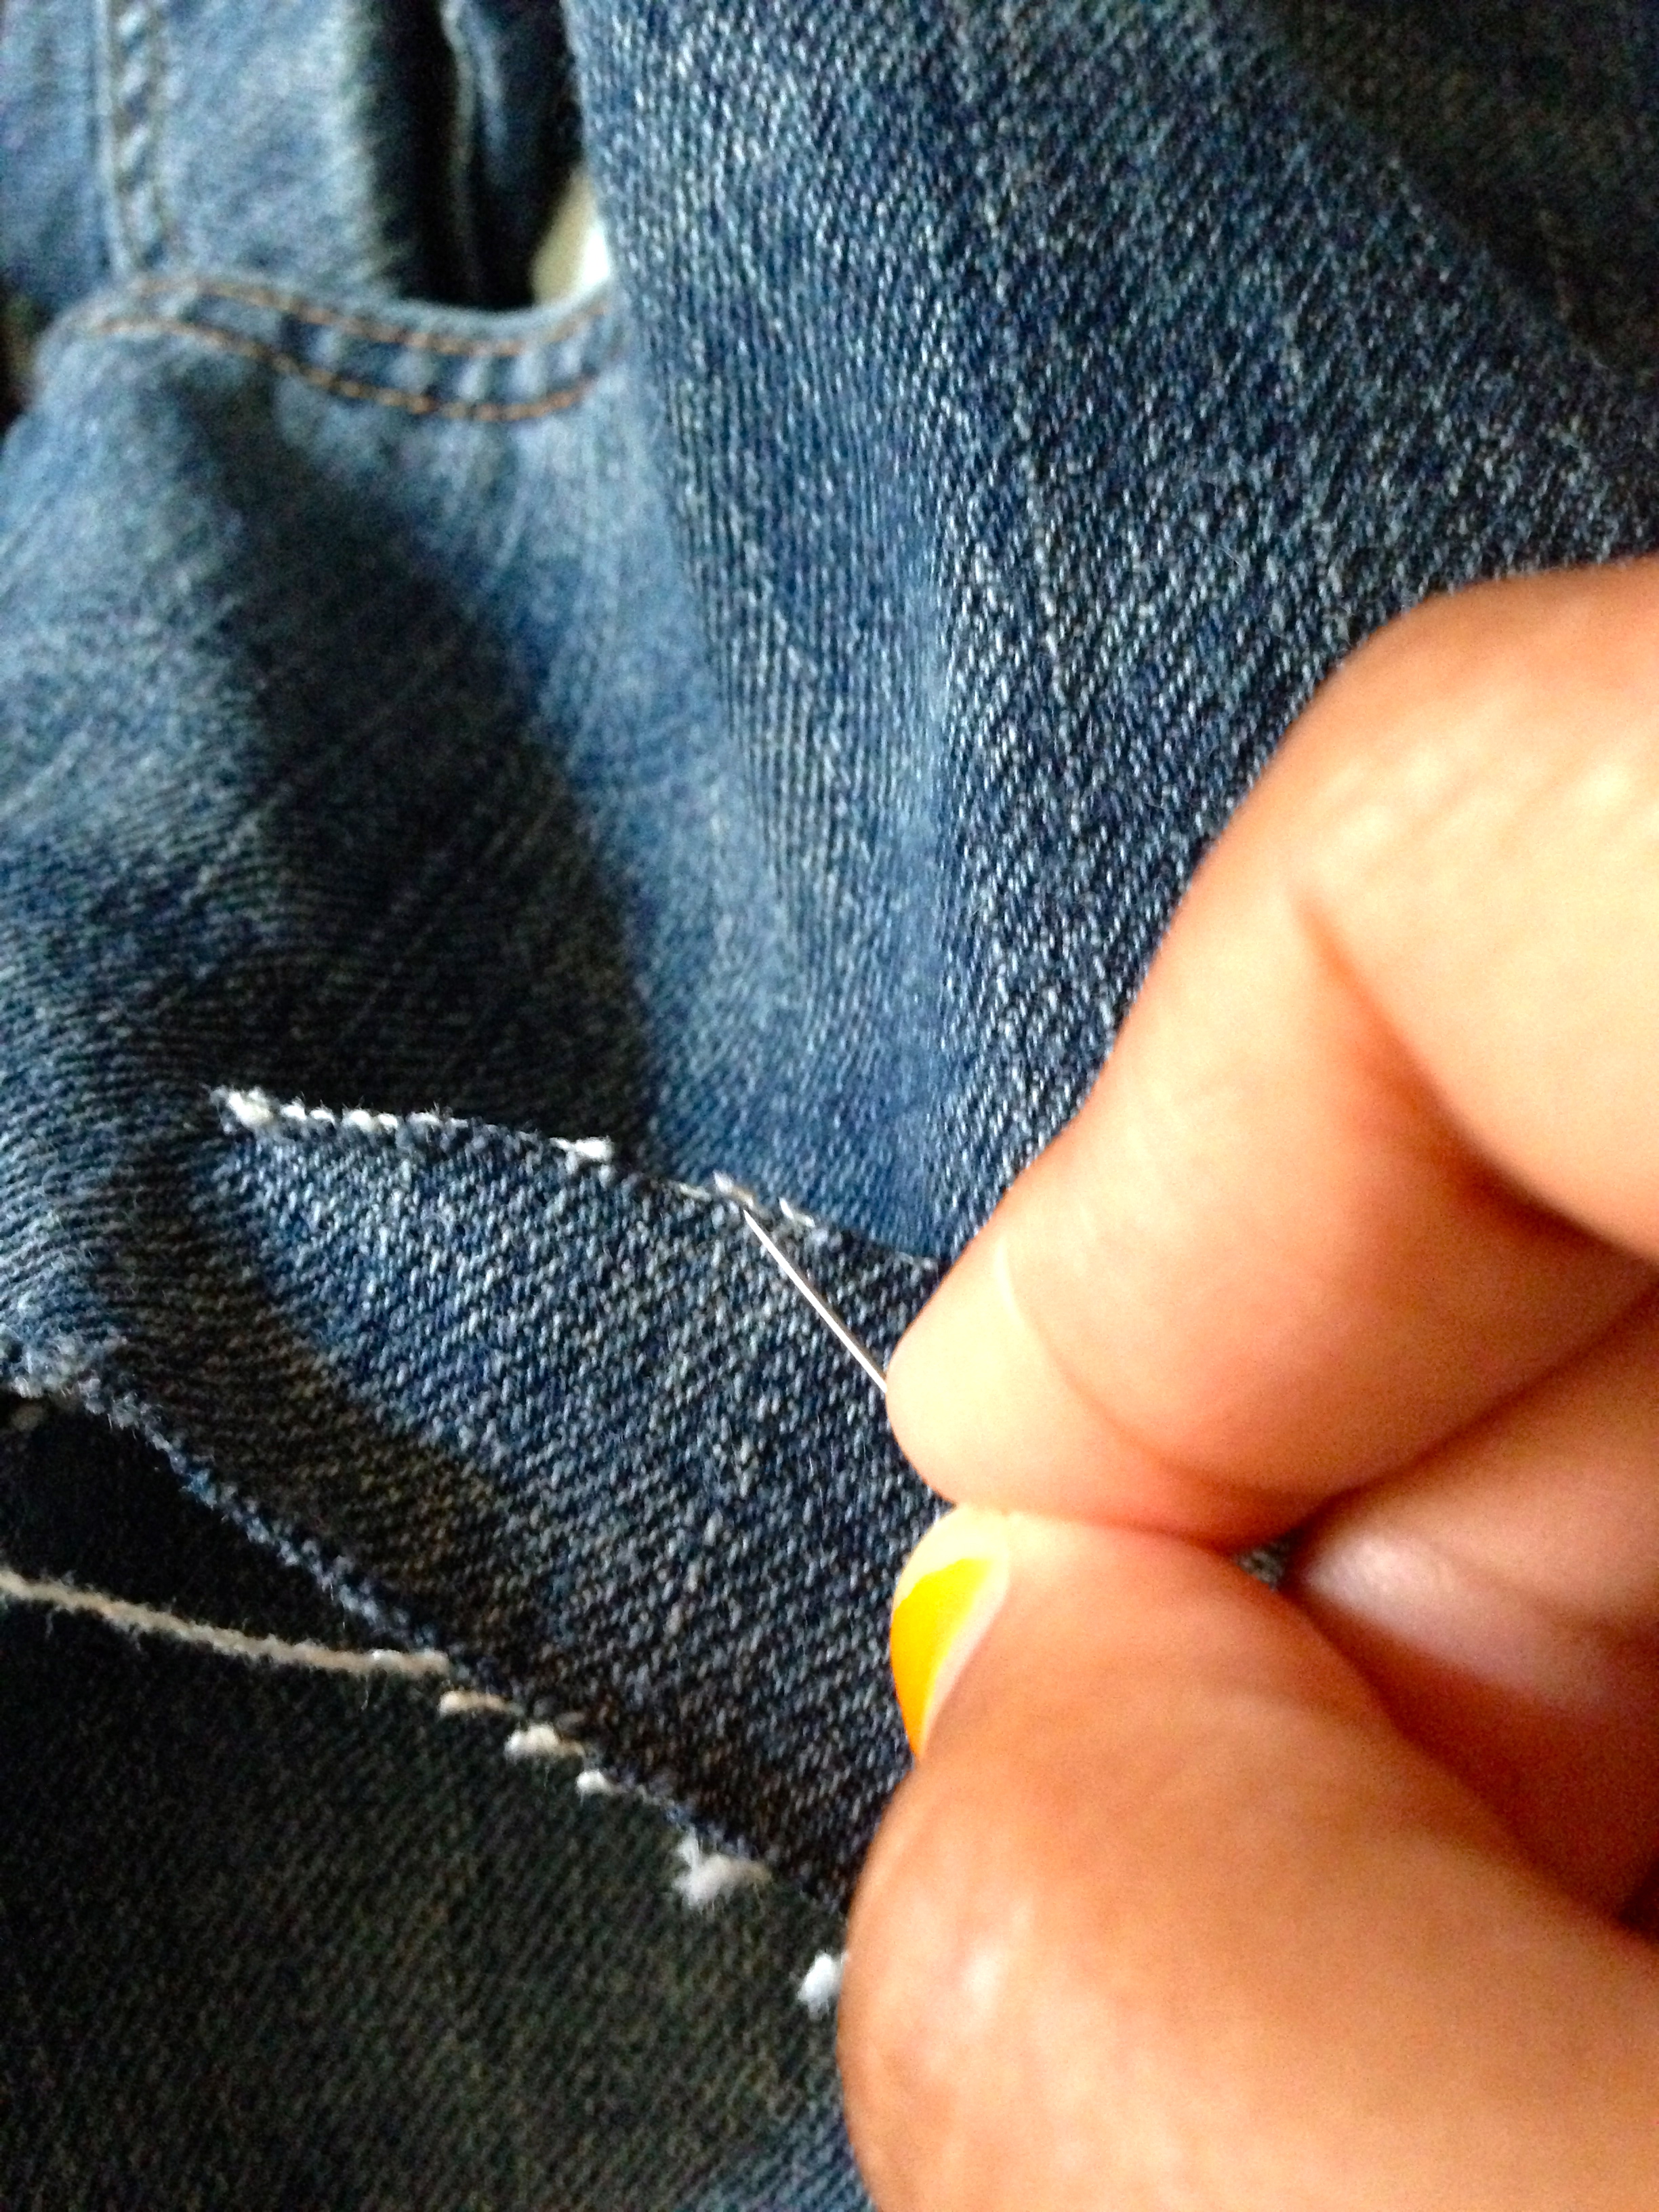 Once you have cut your desired slits, pull at the white threads with a fine needle to loosen and separate from the blue threads. Pick at the white threads individually and lift them away from the denim edge. This helps to loosen the white threads and also the blue ones.
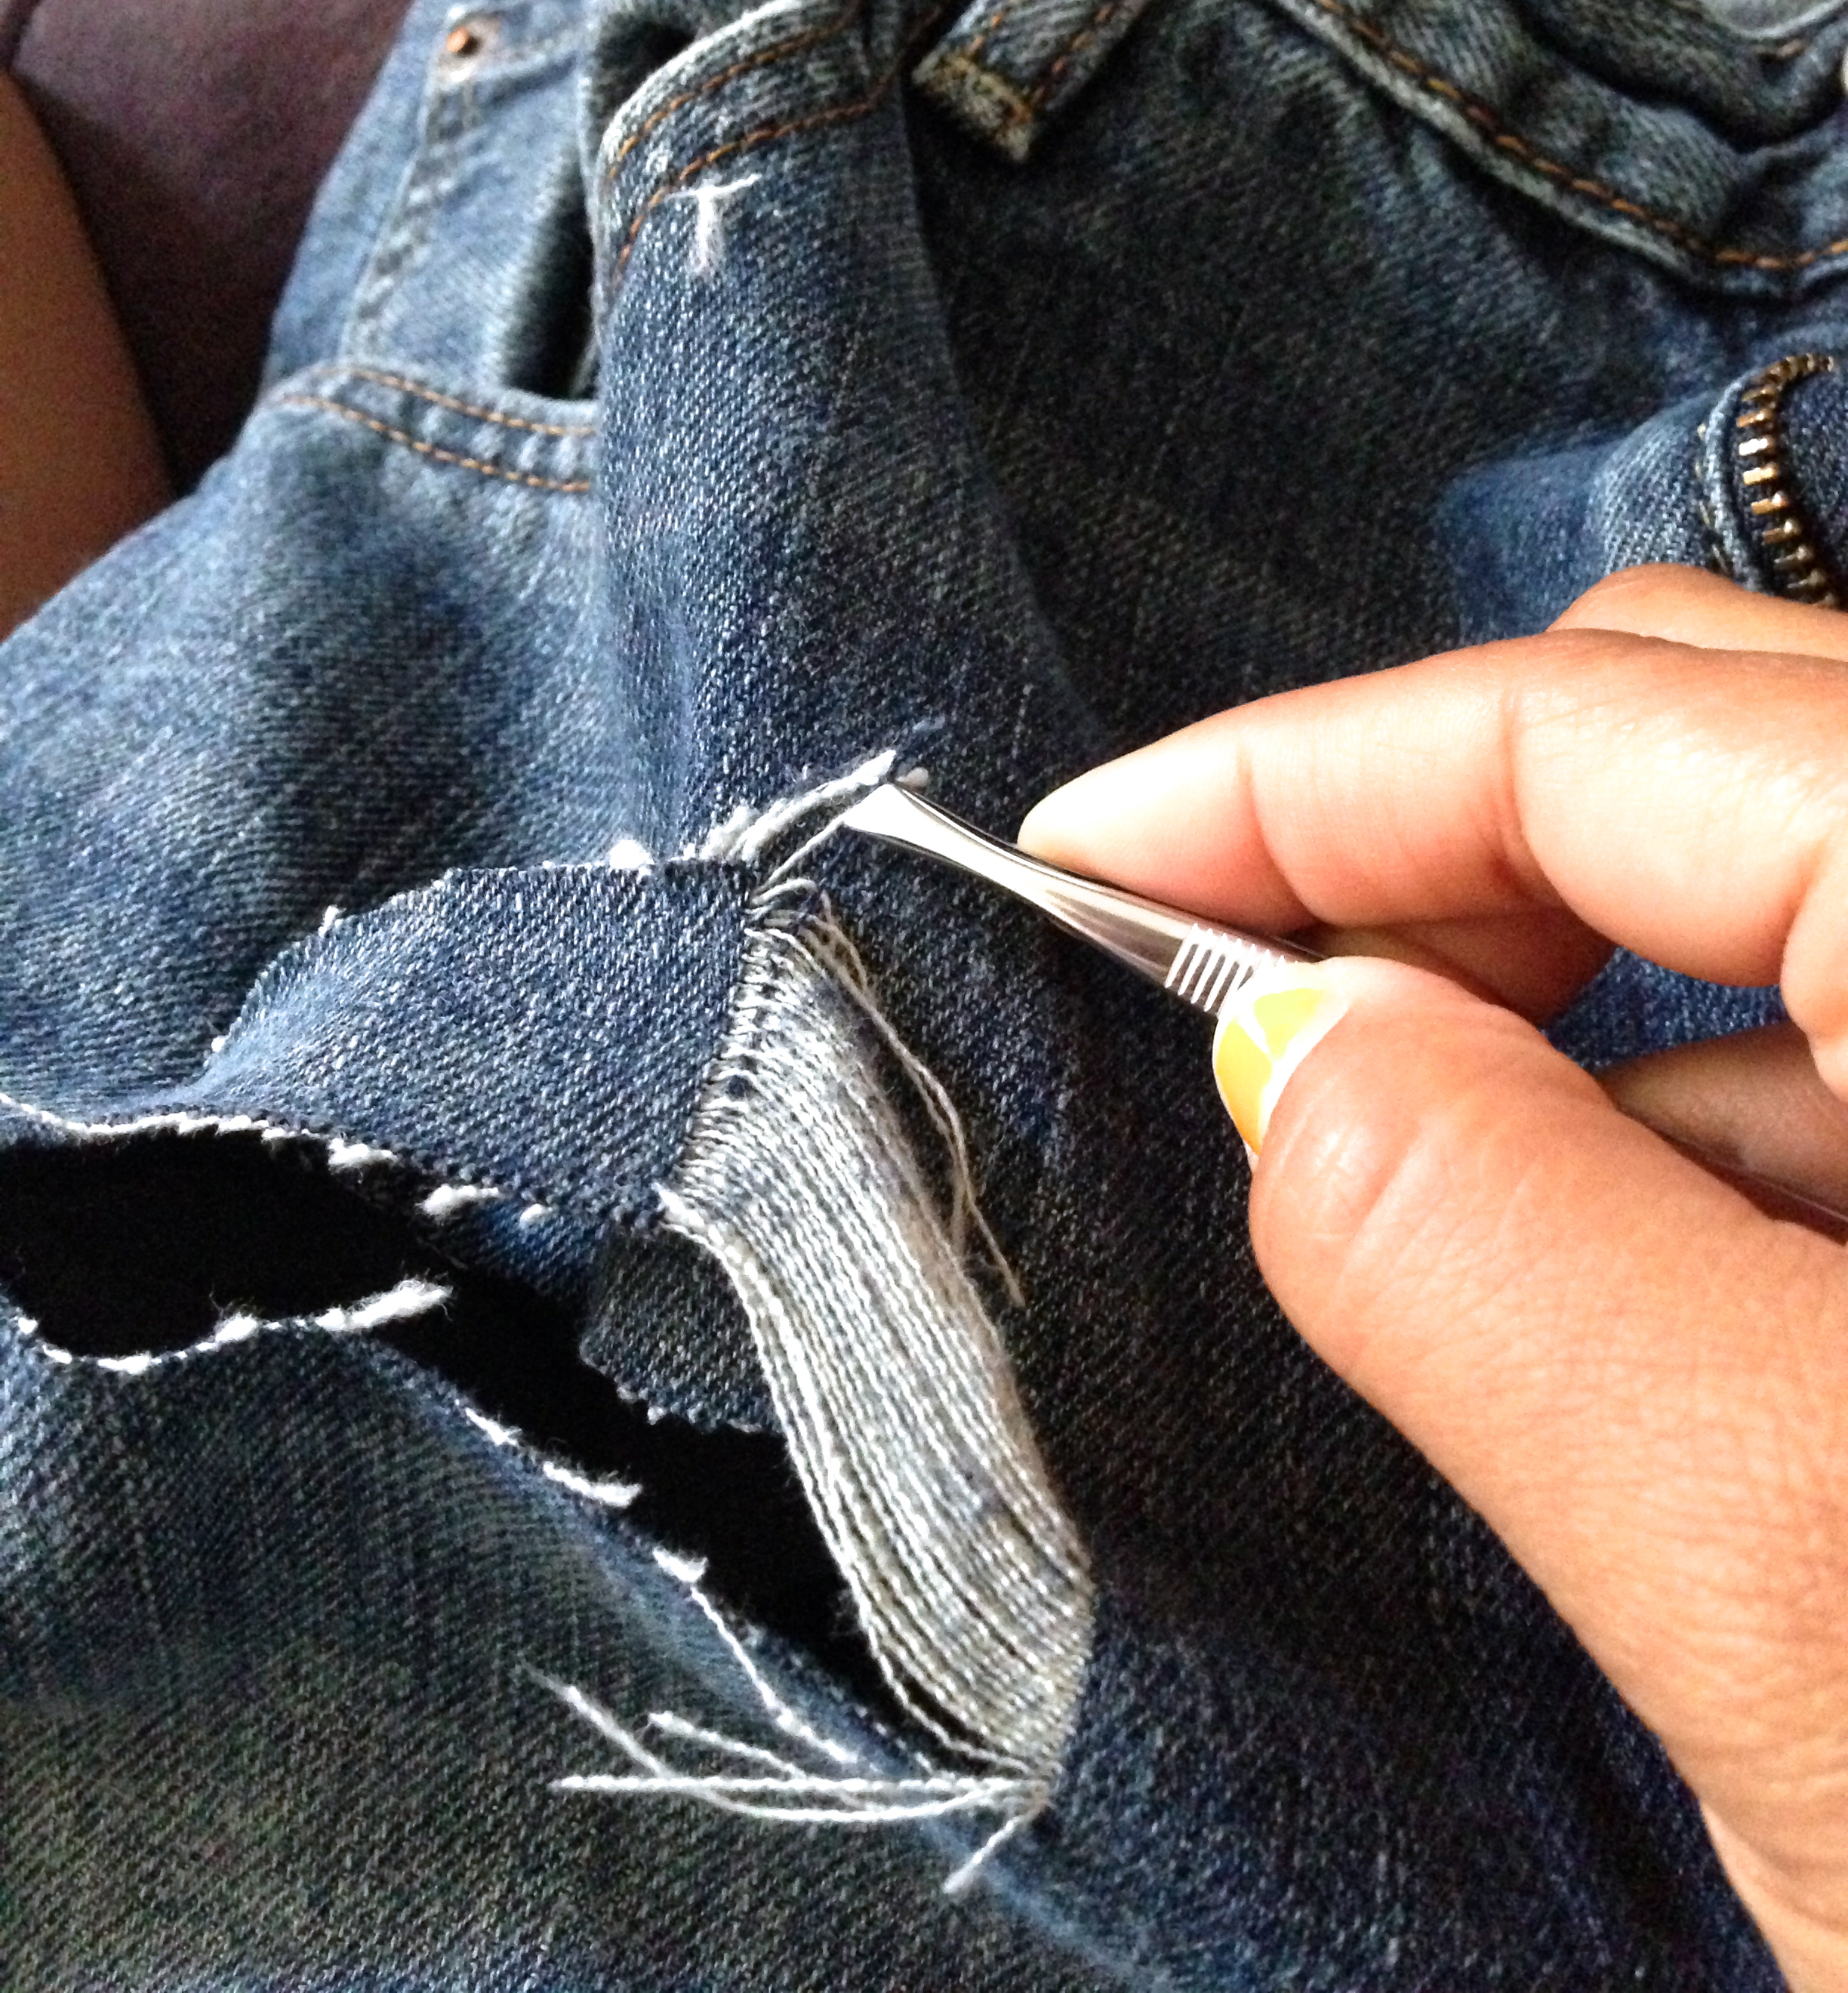 Use your tweezers to pull the blue threads out. This part is a bit of a challenge, but once you get the first thread the rest come out pretty easily. Continue distressing in other areas to achieve your desired look. Don't worry if you mess up here or there, the whole finished product is supposed to look imperfect. That's the whole appeal to the distressed look.
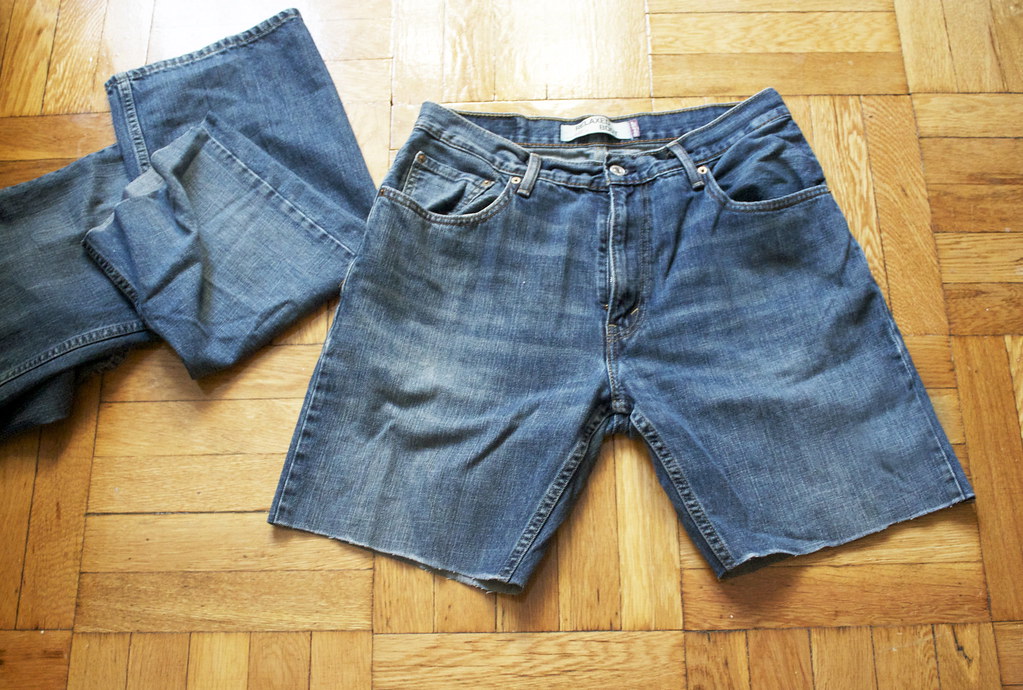
 After you're done, throw them in the washer and dryer to get that fraying and tattered look.
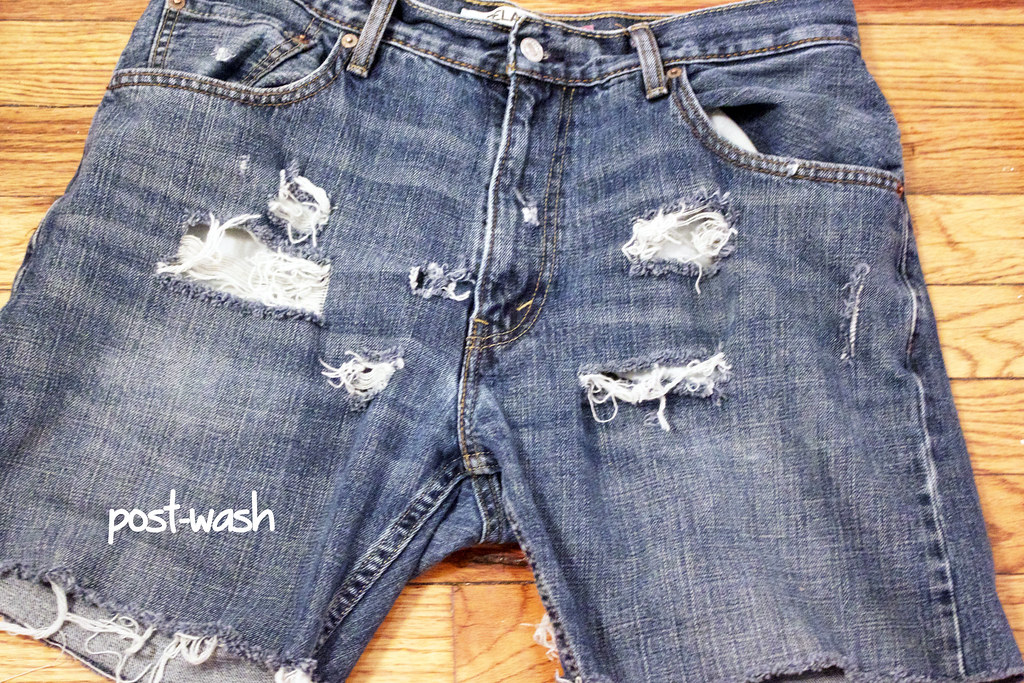
 Voila! Final product after wash and dry.
 *In order to create the perfect denim shorts out of jeans, choose a pair that is slightly looser in the thigh area. I chose a pair of boyfriend levi's.
*One way to choose the perfect length for your shorts is to measure the intended jeans against a pair you already own and are the perfect length. It's always better to make them longer, just to be on the safe side.
*You do not necessarily need to use the needle to dig out the white threads; but I did find it easier on time (and my hands!)
*Always throw them in the washer and dryer. This step is essential to achieving the distressed look.
*If this is your first time distressing, it would probably be best to test out on a pair that you don't have too much love for in the event the distressing doesn't come out exactly the way you want it to.
If you have any other questions, please feel free to email me. I'd be more than happy to help!
Have fun!

Follow me on:
Facebook | Bloglovin' | Twitter | Pinterest | Instagram

No comments:
Post a Comment
Thank you for leaving some love. xo, Rosa